

Consent Pro Web App
Create a custom-site project in the Consent Pro Web App and complete setup. The steps below use example.com as the example domain.
Consent Pro is designed to help with data privacy compliance related to user consent for cookies and website tracking. However, full compliance with applicable data protection laws also depends on factors such as server locations and data processing practices, which remain your responsibility. This tool does not provide legal services. For specific compliance requirements, please consult a lawyer.
Create a project
Sign in with a Finsweet account. The Projects page lists the sites in the workspace. A workspace with no projects shows an empty state instead.
Click New project in the header to open the setup wizard. The wizard has three steps: Connect Domain, Configure Banner, and Install.
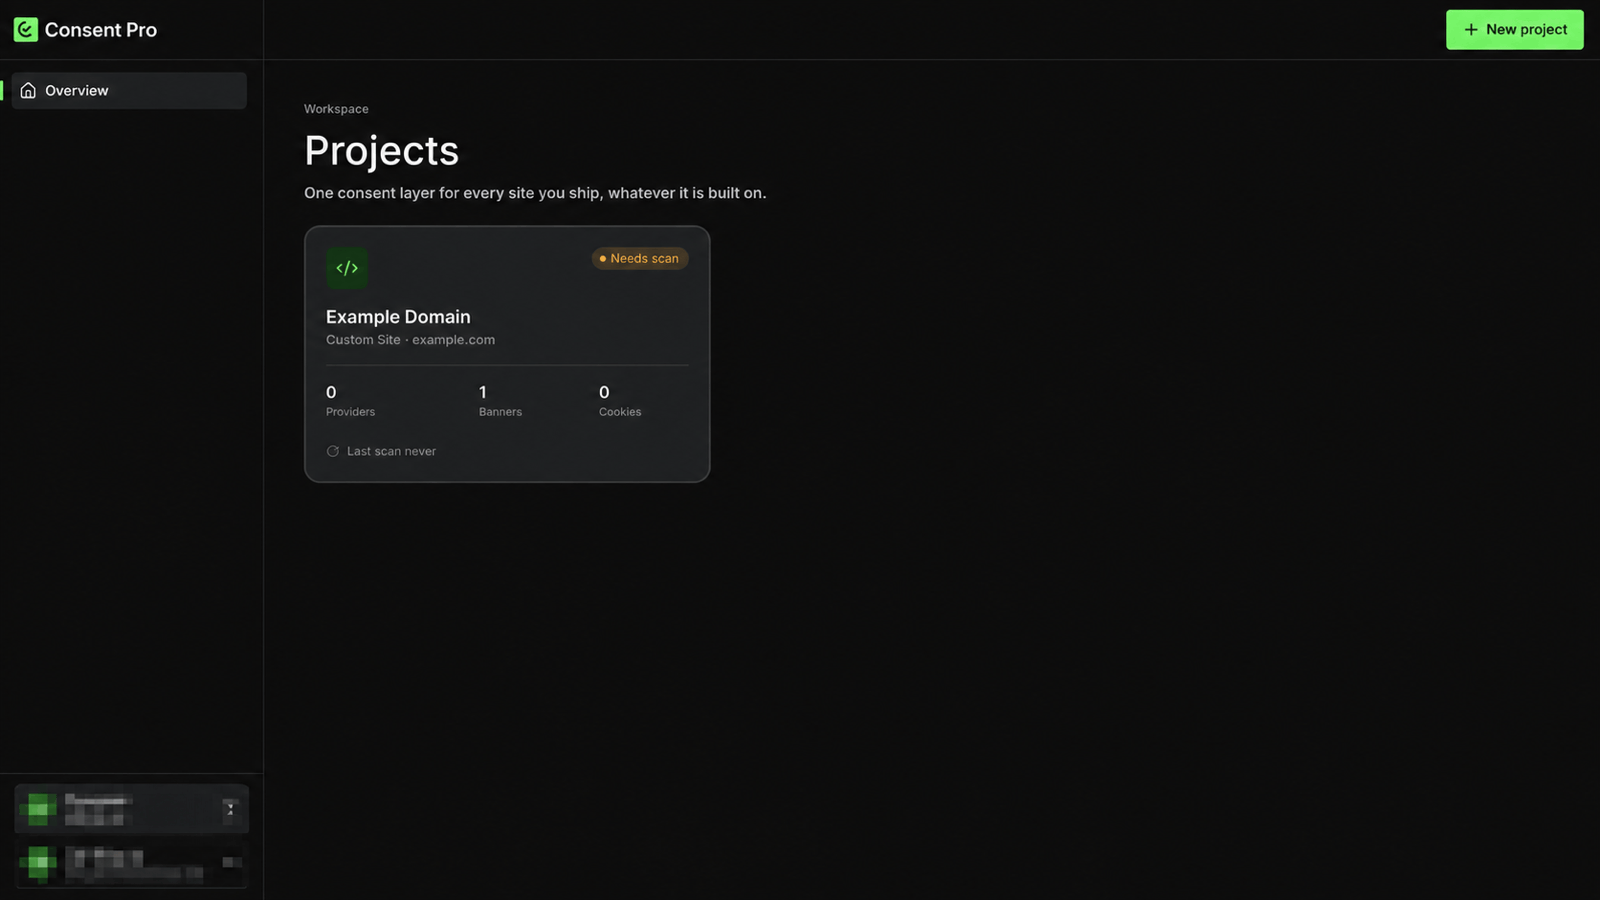
If the workspace has no projects, New project is also shown in the empty state.
Desktop requirement
Consent Pro Web requires a browser width of at least 1024px. The published consent banner is not affected.
1. Connect the domain
Webflow domains
Webflow domains are configured in Consent Pro for Webflow, not here.
Entering a Webflow domain prompts you to set the project up in Consent Pro for Webflow instead.
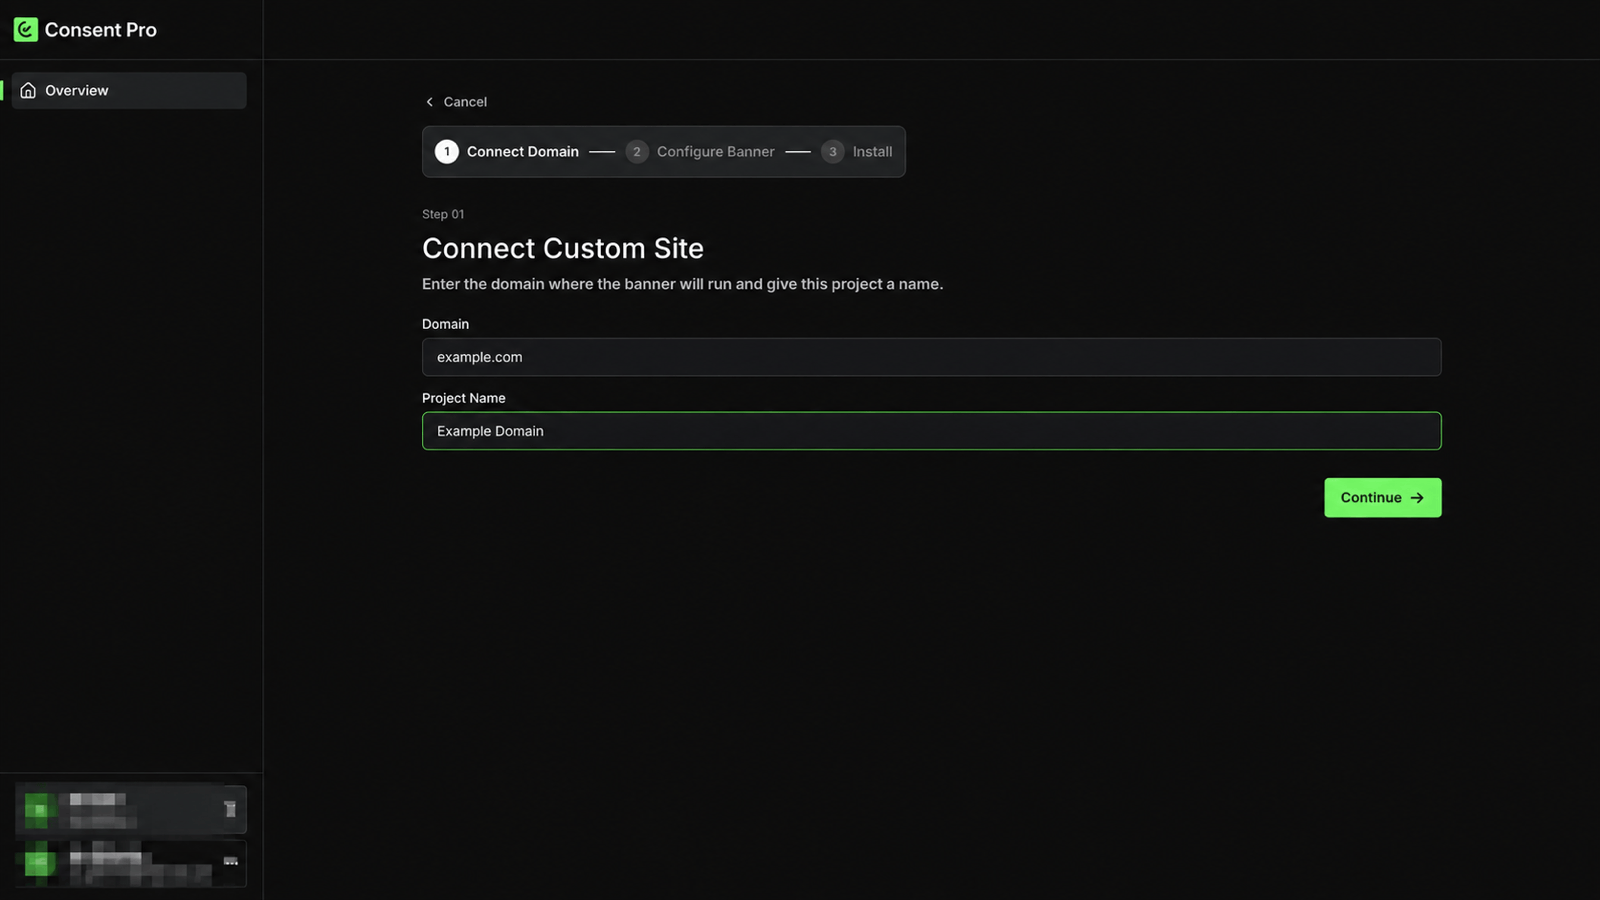
Enter the production domain and a project name.
- In Domain, enter the public hostname — for example
example.com. A full URL is accepted; Consent Pro stores the hostname only. - Edit Project Name to set the workspace label, if needed.
- Click Continue. Consent Pro creates the project and attaches the domain.
Domain requirements
Enter a valid hostname (example.com, www.example.com, app.example.com). Each production domain is a separate project. A domain that is already connected to another organization cannot be used.
After the project is created, the domain and name fields are read-only if the previous step is opened again. Additional domains are managed from the project.
2. Configure the default banner
Set the placement and colours of the project's default banner. Every value here can be changed later from the Consent banner tab.
- Banner Position — Position places the banner (
Top LeftthroughCenter). Controller Position places the persistent controller (Bottom LeftorBottom Right). - Banner Colors — Banner Background, Body Text, Primary Button, Primary Button Text, Secondary Button, Secondary Button Text, and Link Color. Reset Defaults restores the shipped palette.
- Preview — a live preview of the banner and of the preferences dialog.
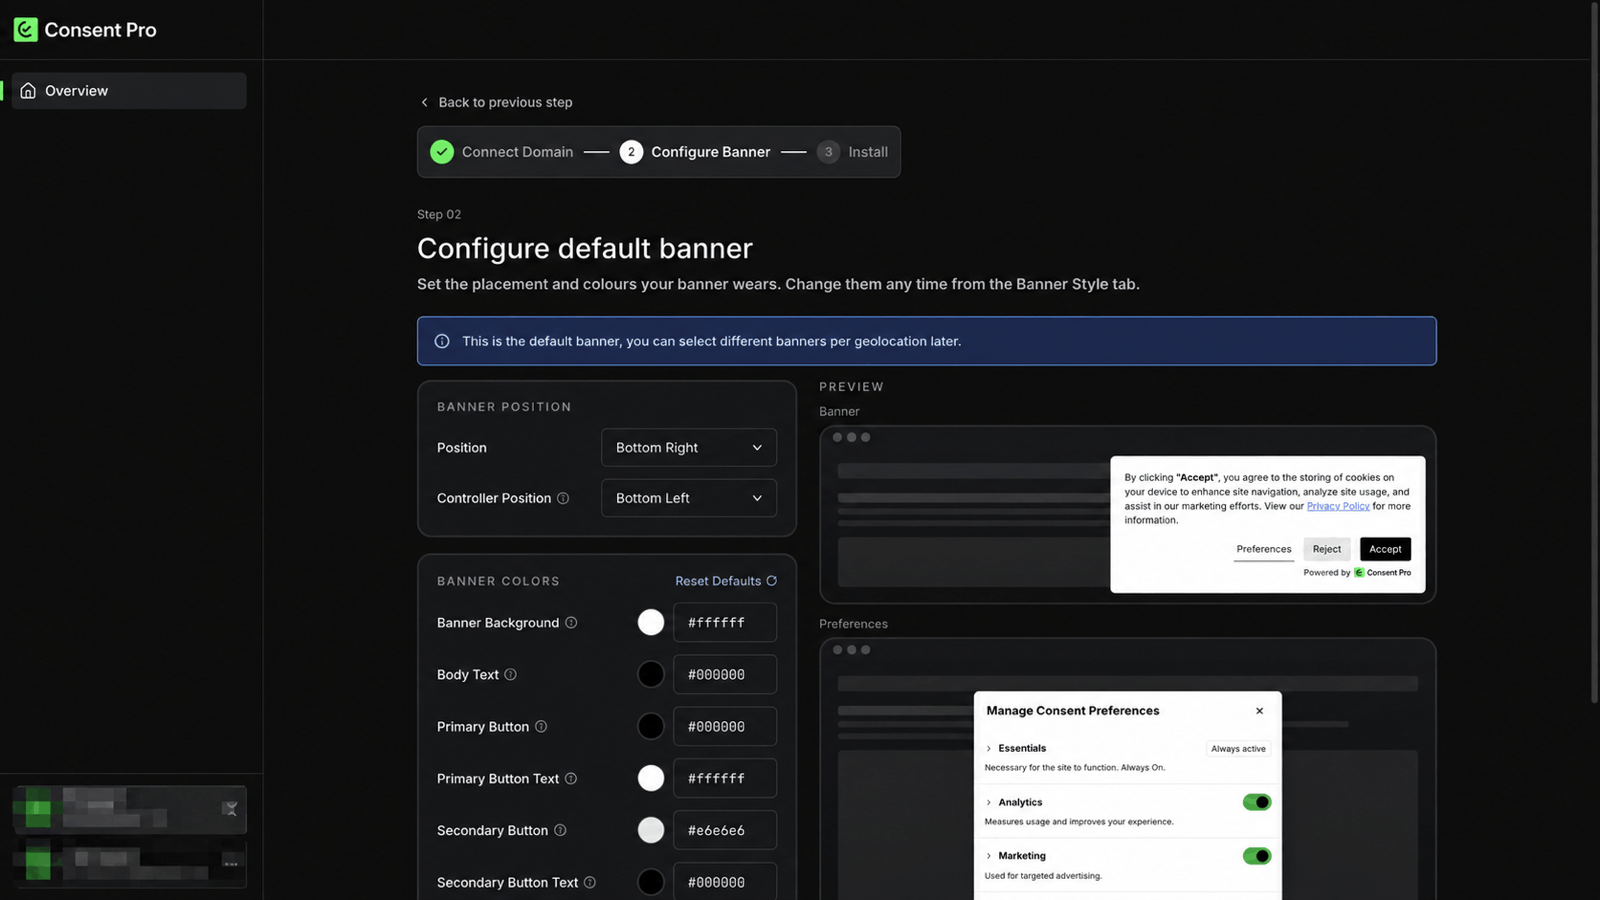
Click Continue, or Do it later to skip styling.
Setup creates a single active banner: Opt In Banner, geotargeted to Global (default). Opt Out Banner, Do Not Sell my Information, and Informational Banner are available to add, each with its own region assignment, from the Consent banner tab.
3. Install the banner
The wizard displays the project snippet. Place it at the top of the site <head>, then publish the site.
The snippet is a single script tag, specific to the project. Use the snippet shown in the wizard — do not reuse one from another project.
<script
  src="https://api.consentpro.com/cdn/core/YOUR_SITE_ID.js"
  data-consentpro-script="runtime"
  data-consentpro-site-id="YOUR_SITE_ID"
></script>
The one response carries your banner configuration and the runtime together, so there is no separate config tag to keep in sync.
- Click Copy code.
- Paste the snippet at the top of
<head>, before other scripts and tag managers. - Publish the site.
- Click Verify installation. Consent Pro checks the published domain for a valid, correctly positioned script.
Verification gates Finish setup
Finish setup stays disabled until Verify installation succeeds. Use Do it later to open the project without verifying — the snippet can be installed later from the project overview.
Required attributes
Do not remove data-consentpro-script or data-consentpro-site-id. These attributes are required for verification and for the runtime.
Finish
Click Finish setup, or Do it later to skip the remaining checks. Either path shows a Setting things up state while Consent Pro prepares the project and checks the domain for a sitemap and a privacy policy page.
If no sitemap is found, a warning is displayed. Set Sitemap path in Consent manager › Scan Settings and the privacy policy page in Project settings › Custom site settings, then run Auto-detect.
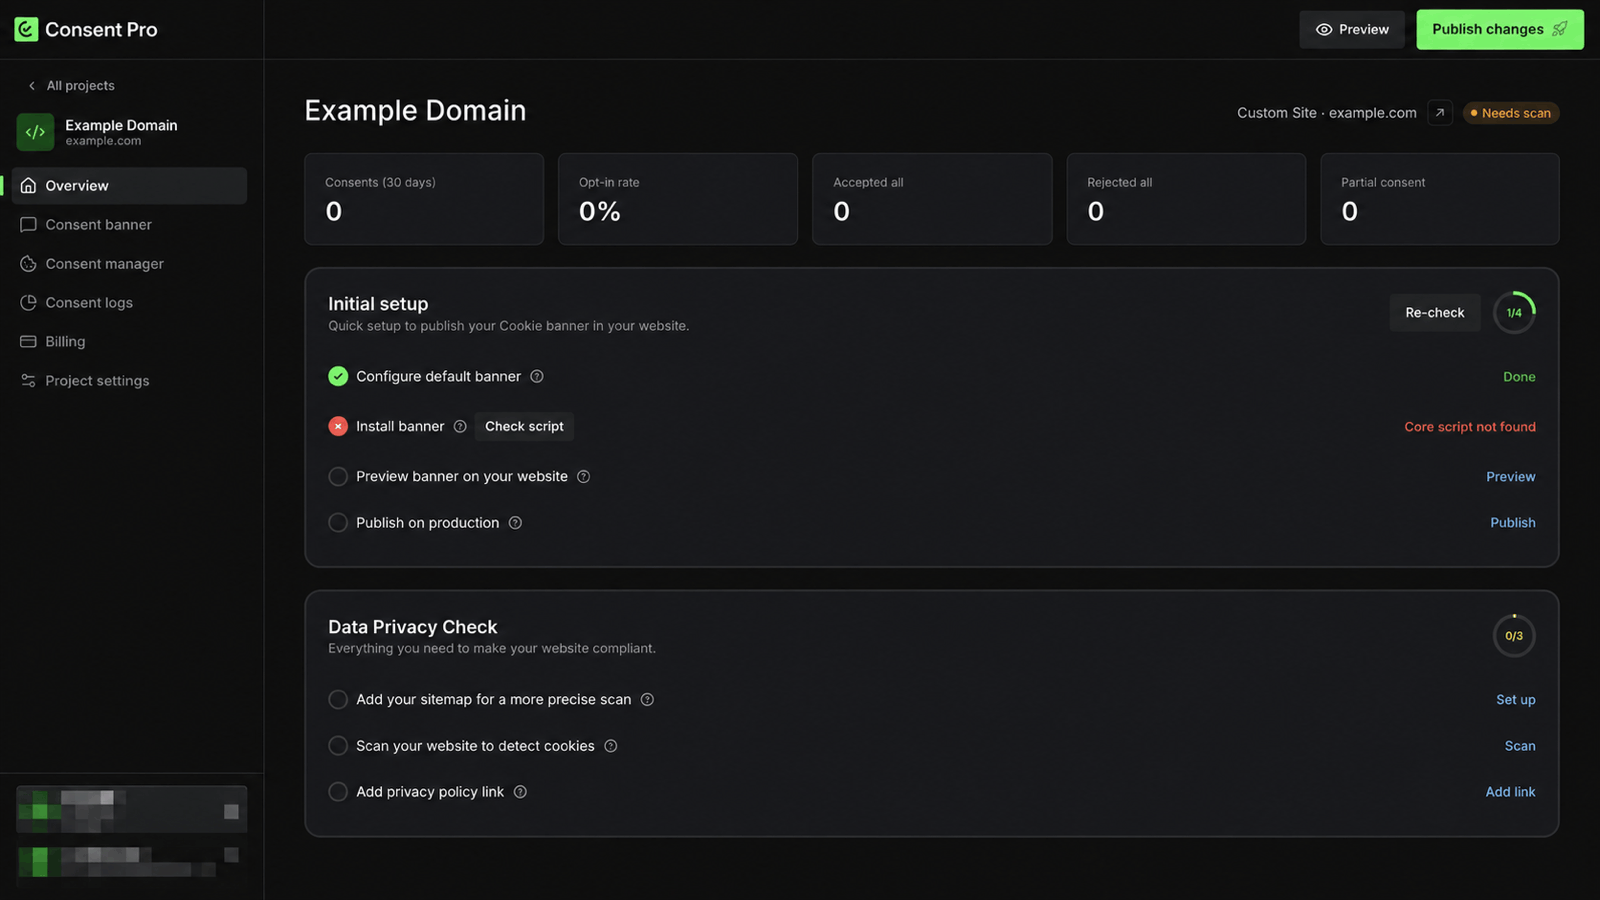
The project Overview opens when setup is complete.
Publish your changes
Your banner modifications will only go live once you click Publish changes.
Once the changes are published, test your site to confirm the settings have successfully reached the production domain.
After setup
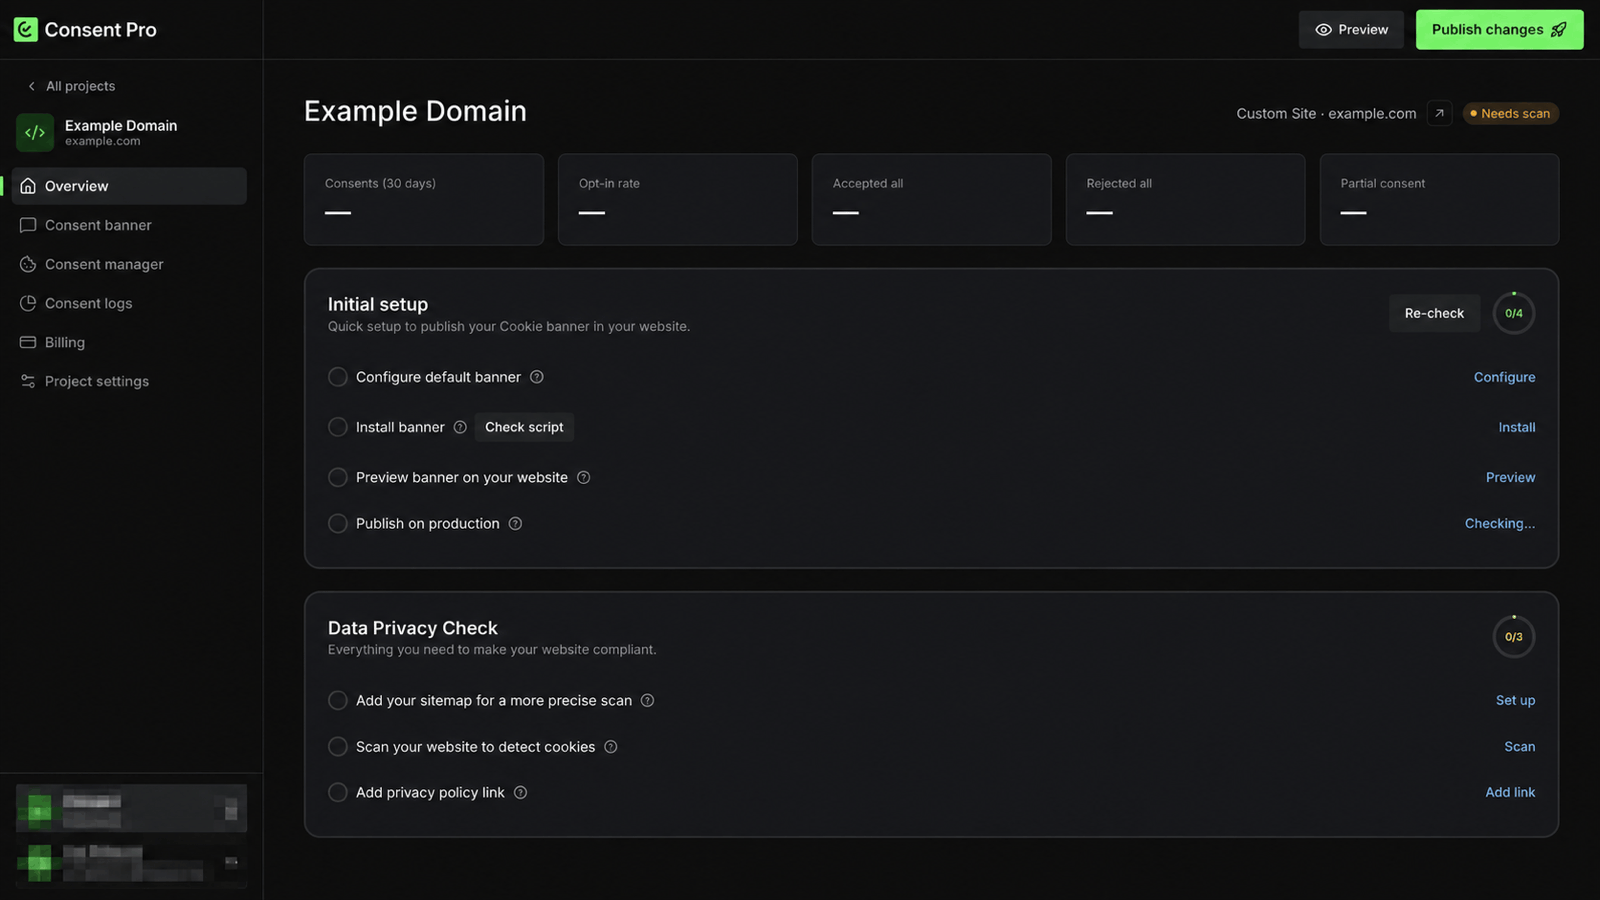
The Overview header reports Consents (30 days), Opt-in rate, Accepted all, Rejected all, and Partial consent.
Initial setup tracks what is left before the banner is live:
- Configure default banner — completed by step 2 of the wizard.
- Install banner — Check script re-runs the core-script check against the published domain; once it passes, the button becomes View script. See Install the Core Script.
- Preview banner on your website — opens your domain with the Debugger attached. Opening it is what completes this step.
- Publish on production — publishes the configuration so it is served to visitors.
Data Privacy Check tracks the compliance items. Rows appear as the project progresses, up to seven in total:
- Add your sitemap for a more precise scan — set Sitemap path in Consent manager › Scan Settings. See Sitemap Setup.
- Scan your website to detect cookies — runs a tracker scan from the Consent manager tab.
- Review trackers with missing information — completes trackers the scan could not fully identify.
- Publish the latest changes to production — reappears whenever newer changes are waiting. See Publishing Changes.
- Add privacy policy link — set the privacy policy page.
- Confirm matched trackers from our verified database — review the trackers matched automatically.
- Configure GTM — mark as done once Google Tag Manager is set up. See Google Tag Manager Setup.
Click Re-check after publishing the site or updating custom code.
The workspace plan is managed from Billing. A license is attached per production domain; an unlicensed project will not load the banner on the production domain. See Licenses and Domains.
Project navigation
| Sidebar | Purpose |
|---|---|
| Overview | Status, checklists, and publish. |
| Consent banner | Banner types, copy, style, and region mapping. |
| Consent manager | Tracker scans, scan history, and scan settings. |
| Consent logs | Consent analytics and logs. |
| Billing | Plan and licenses. |
| Project settings | Domains, privacy page, and other project configuration. |
Preview opens a preview of the consent layer. The arrow beside the domain opens the production site.
Leaving the wizard
- Cancel on step 1 returns to Projects. No project is created.
- Back to previous step is available after step 1. After the project is created, the domain cannot be changed in the wizard.
- Do it later is available on steps 2 and 3. It skips the remaining setup and opens the project.